How to install pfSense in a VirtualBox VM on your laptop
Last Updated: Tuesday, December 11, 2018
VirtualBox is a general-purpose hypervisor for x86 hardware. From a technical point of view it is a level 2 hypervisor, meaning it needs an underlying operating system in order to run.
pfSense is, quoting from their site:
a free, open source customized distribution of FreeBSD specifically tailored for use as a firewall and router that is entirely managed via web interface. In addition to being a powerful, flexible firewalling and routing platform, it includes a long list of related features and a package system allowing further expandability without adding bloat and potential security vulnerabilities to the base distribution.
Both are wonderful piece of software to start playing around with two main technologies of Cloud’s landscape: virtualization and security. Why not put them together?
Wait a minute: why someone in a sane state of mind would ever try that? Usually pfSense is deployed on a dedicated physical server, especially in an home environment: you get some old computer which is taking dust in the closet, put on an additional NIC, install pfSense and start playing around.
Well, following are the main reasons behind this attempt:
1) you may not have an old computer laying around. This is partly my case: I have one, but it is a really old 32 bit one and I should install a very old pfSense version.
2) if you install it on a physical computer, then you have to plug it in your network in order to test things. Now, I don’t know you, but in my home network I have some 40 NICs with an assigned IP address. Messing with the wrong command in the firewall would mean that all the family will be without Netflix and that would be a major critical situation. Having the firewall in a VM will allow me to experiment without messing around with the whole network.
3) I’m running a side-project which will require to install pfSense in an ESXi environment in the future, so I need to better understand some concepts before to move there.
4) Placing a real firewall in front of my laptop could come in handy sometime. Who knows? It should allow to put some more defense in front of my primary computer - the one I use for important stuff like home-banking - shielding it from my children’s activity.
5) It’s fun.
So, let’s start!
CAVEAT: This is not intended to be a manual about how to install VirtualBox, or about how to configure pfSense features. The main scope of this tutorial is to have pfSense running in a VM, handling all the traffic to/from my laptop. I assume you know how to install VirtualBox in your environment; how to move around in a FreeBSD environment and the likes. If you don’t, head to the appropriate forums for help: Google is your friend, if you firewall would allow you to contact it. Good luck!
Network Layout
The starting layout is commonly the one depicted in Fig. 1 below.
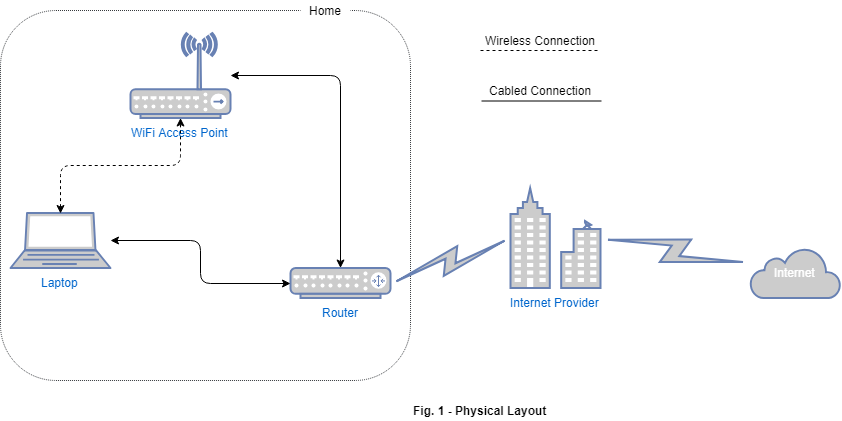
Our laptop has usually two ethernet connections. The first one is a cabled connection to a router; the second one is a wireless connection to a WiFi Access Point (usually in the same case of the router, but logically separated). The router connects our home with the Internet Provider who, in turn, connects us to the Internet.
The router has two IP Addresses. The first one is assigned to it by the Internet Provider and it represents how it is known by the outside world. We have no control over it, and it is of no interest for the task at hand. If you should be interested in knowing what your public IP address is, head up to Google and search for finding my ip address. I will not publish my one here for security reasons, and neither should you.
The second router’s IP Address is the internal one. It represents how it is known from the inside of your house. In other word, it is the address your laptop contacts whenever if wants to reach out on the Internet. It is commonly known as Gateway in the network configuration panel.
You can assign it at your pleasure, depending on the layout of your network. Usually, you will find it has mainly two addresses: 192.168.1.1/24 or 10.0.0.1/24.
In this tutorial we will assume that the home-network is configured in the 192.168.1.0/24 range and we aim to place our laptop in a 10.0.0.0/24 network, with pfSense in the middle handling all the communications.
The final status is depicted in Fig. 2 below, where we have removed everything outside the house, which is not under our control.
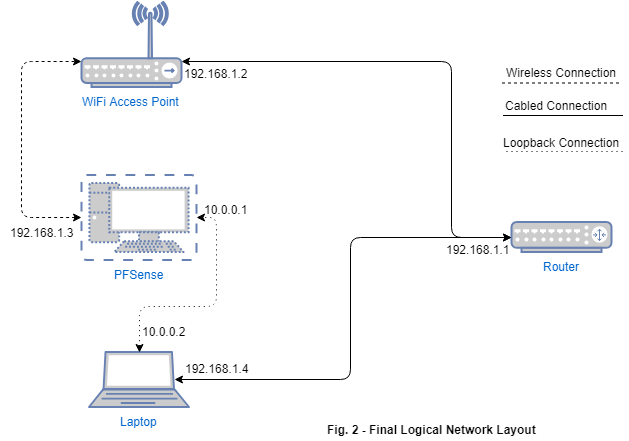
Basically we want that when we use the wireless connection, all the communications are filtered by pfSense. When we plug an ethernet cable, the laptop will be able to communicate with the router directly. This configuration will provide us two benefits:
1) we can still bypass the firewall by plugging a cable, should something go extremely wrong.
2) we can use the firewall on an untrusted external WiFi connection.
On the cons side, we cannot use the wireless connection without starting the pfSense virtual machine.
So, how do we accomplish this configuration? Let’s start from Step 1.
Step 1 : Create the Loopback adapter
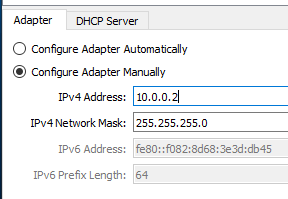
The first step in our configuration is to create the dummy network interface that will handle the traffic to the pfSense virtual machine. To do so, follow the steps detailed below:
In the VirtualBox Manager console, select File–>Host Network Manager, then click on the Create icon to create an Host-only Network Interface. This will create a new network interface on your laptop, called VirtualBox Host-Only Ethernet Adapter.

This creates a new software interface on your laptop, which will appears next to your existing network interfaces. This will be the interface our laptop will use to communicate with pfSense, so let’s configure it that way.
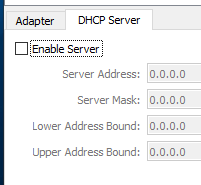
In the Host Network Manager, select the Adapter and click on the Properties icon. Then configure it in the following way and press OK:
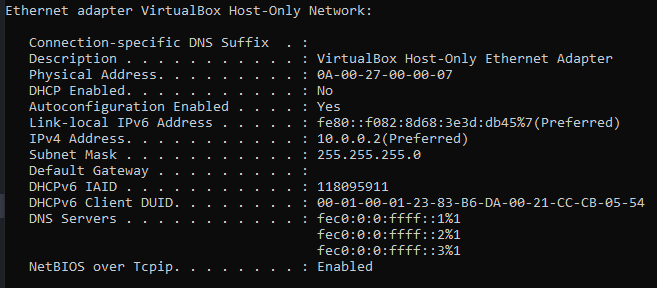
If everything went fine, you should now see the new adapter in your ipconfig output:
Step 2 : Create the pfSense Virtual Machine
The next step is to create and configure the guest virtual machine for pfSense.
In the VirtualBox Manager select Machine–>New and follow the steps detailed below:
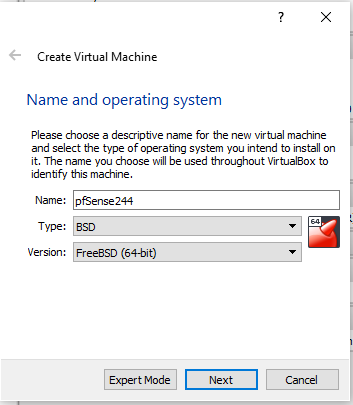
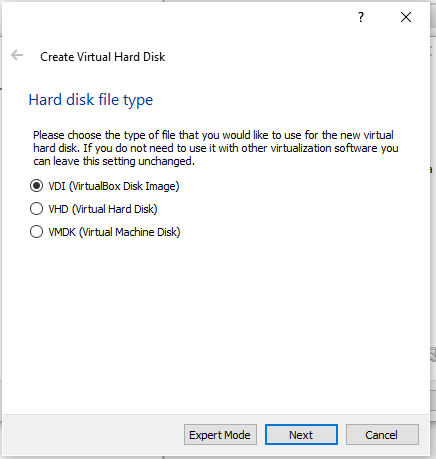
Click on Next
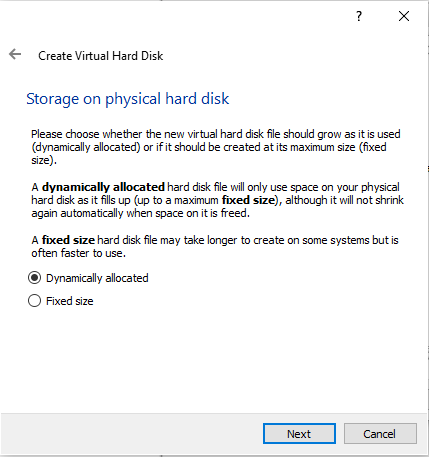
Click on Next
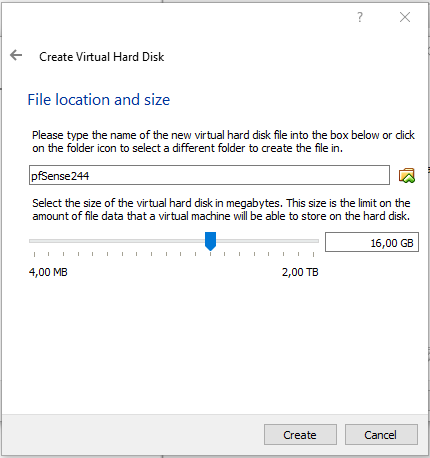
Click on Create
Click on Next
Click on Next
Click on Create.
You virtual machine is now created and ready to be used.

Before to move on and actually install pfSense in it, we need to configure it a little bit more. Select the newly created VM, click on the Settings icon and follow the steps detailed below:
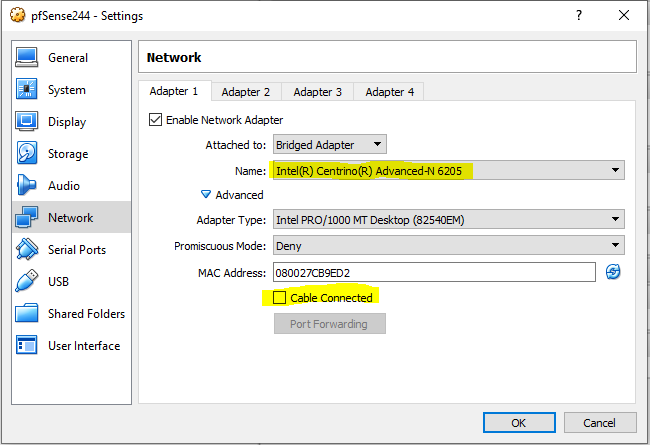
Here, pay attention to the following:
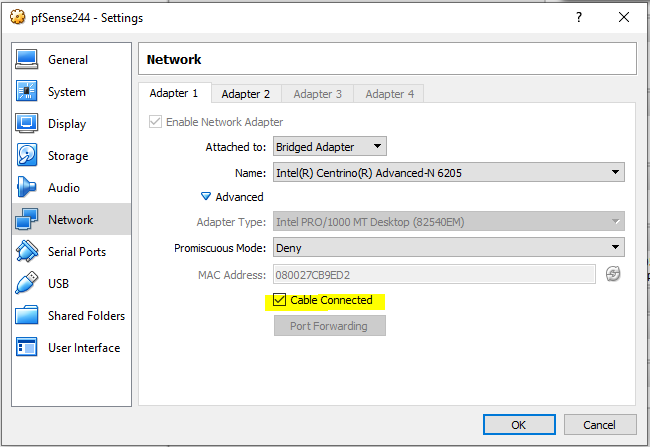
1) in the Name field be sure to select your Wireless adapter. This will be the WAN port of your firewall (aka: 192.168.1.3).
2) be sure to untick the Cable Connected checkbox. You want the network card installed but disconnected in order to better identify it later during the pfSense installation.

Here, pay attention to the following:
1) in the Name field select the Host-Only Adapter we have created in the previous step.
2) be sure to untick the Cable Connected checkbox, for the same reason as before.
Take note of the MAC addresses assigned to these network cards. They will come in handy during pfSense configuration.
Click OK.
We’re now ready to install pfSense.
Step 3 - Install pfSense
As specified above, I will not provide here a step by step guide about how to perform the installation; for that, head to the pfSense Documentation page.
What I will provide here, are the steps and configurations involving VirtualBox.
Go to the pfSense Download page and download the ISO package
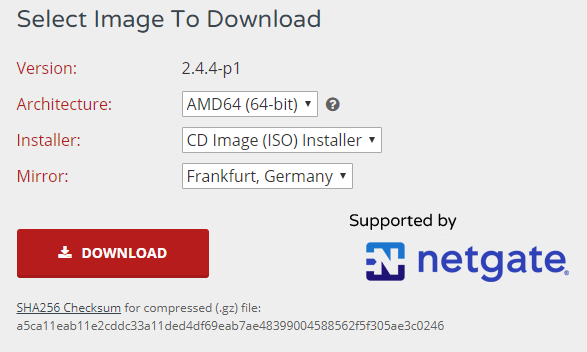
Be sure to verify the downloaded files as explained in the documentation before to proceed and use them. You don’t want a compromised firewall protecting your laptop, don’t you?
Now that you have the installation file, move back to the VirtualBox Manager, open your VM settings and mount it:
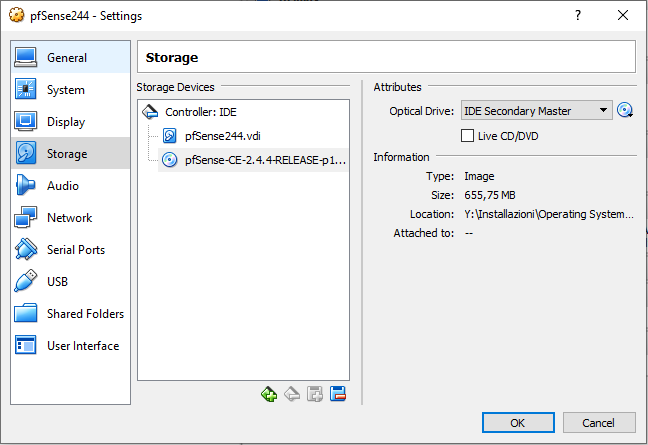
Press OK and we’re ready to go! Start your VM and the installation process should begin right away. For a step-by-step procedure follow the pfSense Documentation.
One caveat: when you reach the final installation step and the installer asks you to reboot the machine,
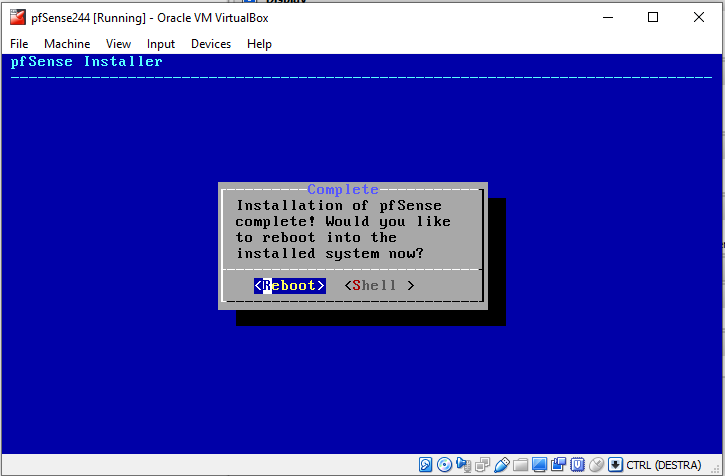
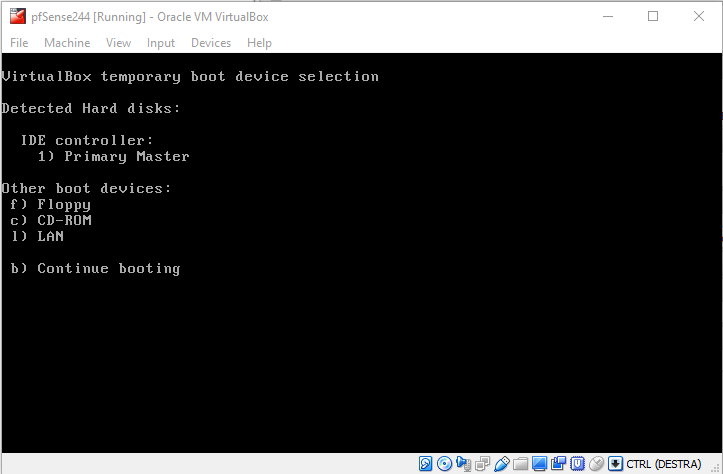
Be sure to not boot the installer again. In order to do so, when the VM reboots, press F12 to enter the boot menu and select option 1) Primary Master in order to boot the newly installed system.
When the VM boot to pfSense, you can remove the ISO image by selecting Devices–>Optical Drives–Remove Disk from Virtual Drive
Come back here when the installation is complete.
Step 4 - Configuring pfSense LAN Network interface
So you’re back. Good! I assume you are seeing this in your running pfSense244 Virtual Machine
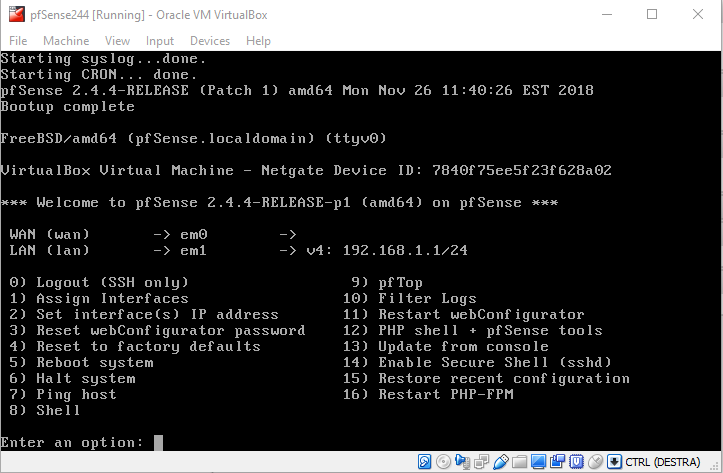
If not, something went wrong during the installation: go back and troubleshoot a little.
If yes, congratulation: you’re ready to configure the pfSense network interfaces.
Remember when I told you to take note of the MAC addresses of the cards? Here is where you use them.
In the pfSense console, select option 1) Assign Interfaces. You will be presented with the VLAN configuration
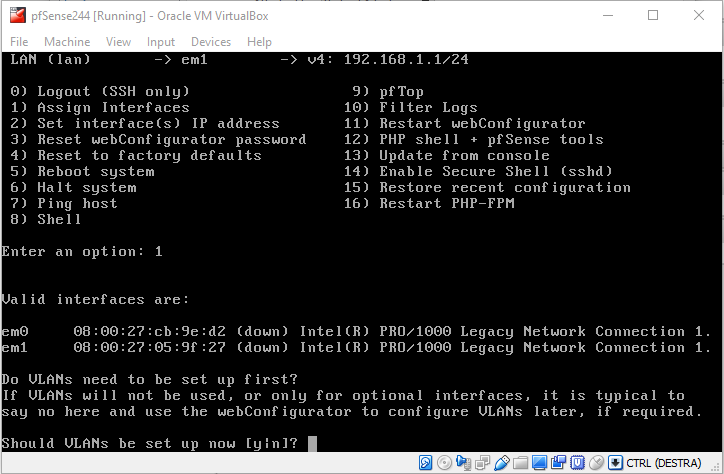
Since we are not going to define VLAN here (we’re not that crazy, are we?), answer n to the question.
Next you will be presented with the WAN interface. This is the Adapter 1 we configured before. Retrieve its MAC address and select the right interface. In my case it is em0:
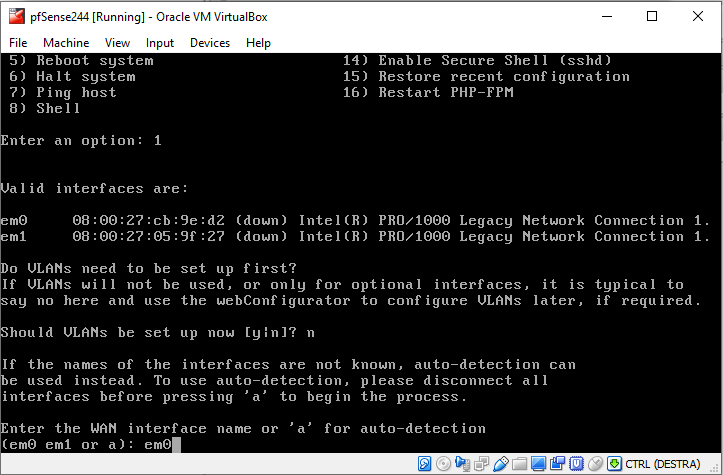
Now select the LAN interface: em1 in our case
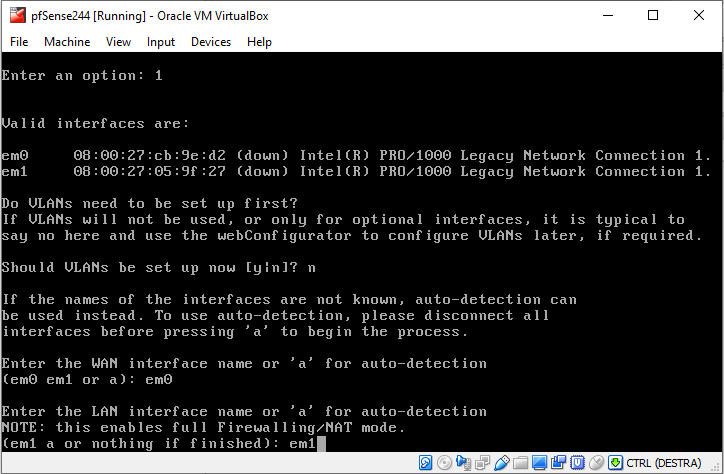
Answer y to the next question to assign the interface and this step is completed.
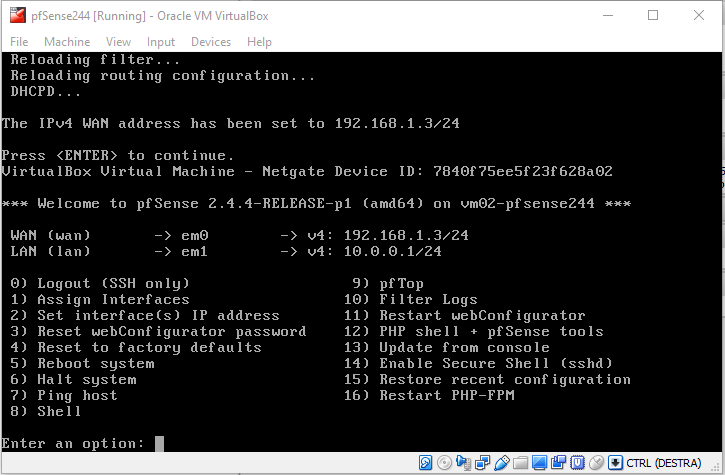
You should now see something like this in your console:
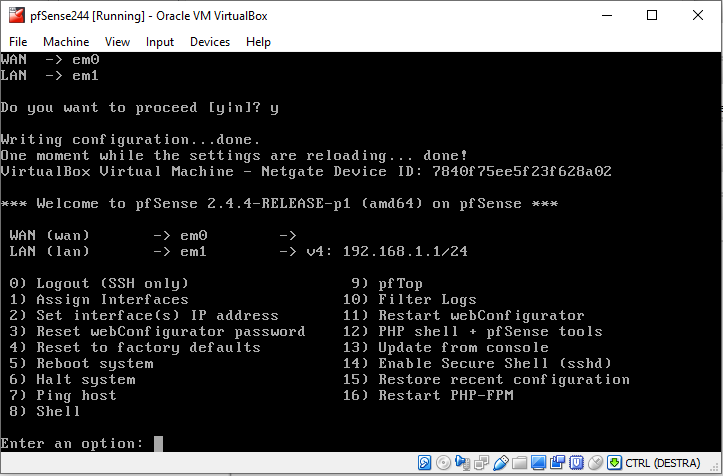
Note the ip address of the LAN interface and note that this is not what we want. According to our plan, the LAN interface should be assigned the address 10.0.0.1. The address assigned to it is not only wrong, but is colliding with the one assigned to our router!
In case you were wondering: this is the reason why we did not connect the cables to our virtual interfaces. Before to connect them, we need to manually configure the LAN interface according to our network Layout.
So, back to the pfSense console:
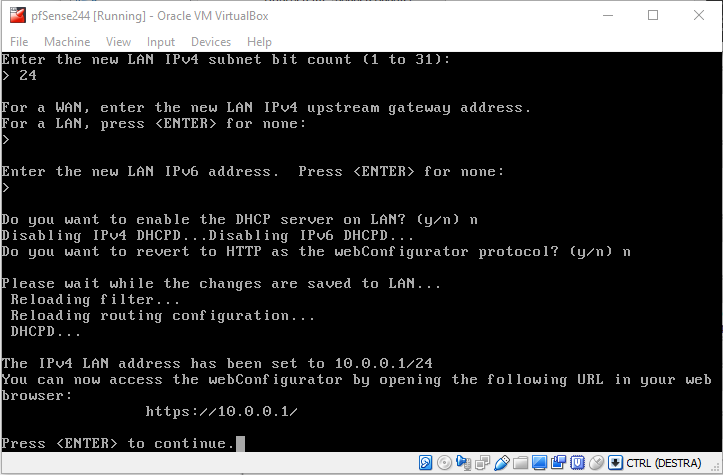
- select option
2) Set interface(s) IP address - select option
2 - LAN (em1 - static) - enter the new LAN IPv4 address:
10.0.0.1 - enter the new LAN IPv4 subnet bit count:
24 - press
ENTERto complete the procedure - skip all the IPv6 address configuration (we are not using IPv6 here)
- answer
nto the request to enable the DHCP server on LAN - answer
nto the request to revert to HTTP for the webConfigurator protocol
You should now see the following:
So, we are ready to give the webConfigurator a try, but first we need to be sure we are really connecting there, so we need to disconnect our laptop from the network.
- Detach any ethernet cable you should have attached
- Disconnect from the wireless connection that will take over
Verify that you are effectively disconnected by the external world by trying to reach your default gateway 192.168.1.1
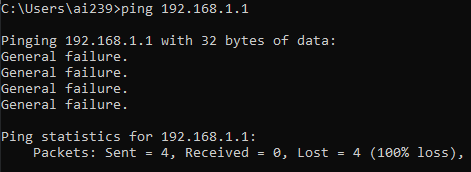
To further check, issue an ipconfig /all command in a console and verify that the only connected adapter is the VirtualBox Host-Only Ethernet Adapter, with an ip address of 10.0.0.2.
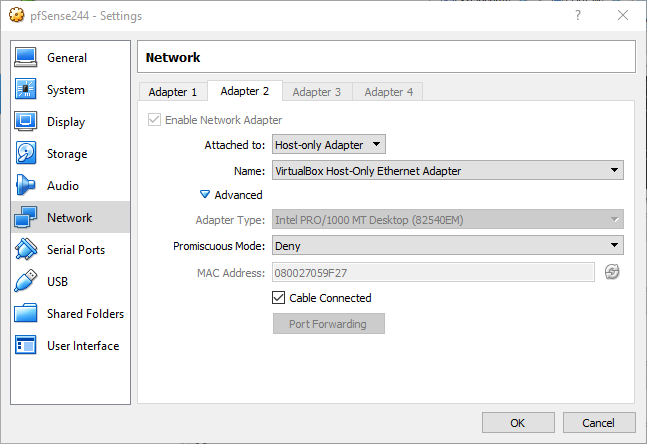
Now, it’s time to connect the cable of the virtual LAN adapter. Move to pfSense244 network settings, check that Cable Connected checkbox on Adapter 2 and press OK
Now it’s the moment of truth: start your favorite web browser and connect to https://10.0.0.1. You should be presented the Sign In page of webConfigurator
Ignore the security alerts of Chrome: of course your certificates are not known to the world! You are disconnected from the world in this moment!
According to the manual, the default is admin/pfsense. Don’t be worried to use them for now: we are still disconnected and we will change them immediately before to connect the WAN.
Once logged in, proceed to the initial configuration steps following the instructions presented on screen. They are quite clear, so I’ll place no pictures.
At the end of the configuration, you will be granted with the pfSense Dashboard
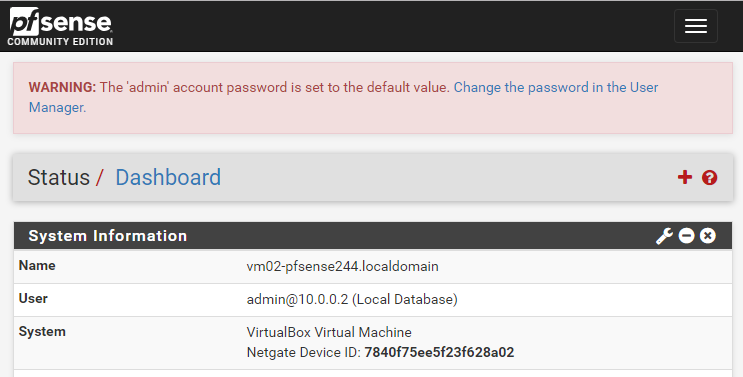
Congratulation! You’re halfway down the road.
Step 5 - Configuring pfSense WAN Network interface
Now here comes the tricky part: configuring the WAN interface.
Let’s start by shutting down our pfSense VM for the moment.
Now, let’s reconnect to the WiFi network. The tricky part here is that the host (aka: our laptop), need the network interface active for the pfSense VM to bridge on it, while at the same time ignoring it.
If you run an ipconfig -all command, you will notice that we have the network interface up, but at the same we have an ip address we do not want (or the laptop we’ll be able to bypass the firewall and connect directly to the outside world).

To avoid this, open the Wi-Fi Properties of the network card and disable Internet Protocol Version 4 (TCP/IPv4) and Internet Protocol Version 6 (TCP/IPv6)
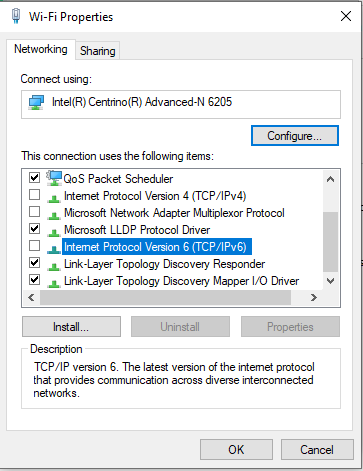
This will also disable Client for Microsoft Networks and File and Printer Sharing for Microsoft Networks.
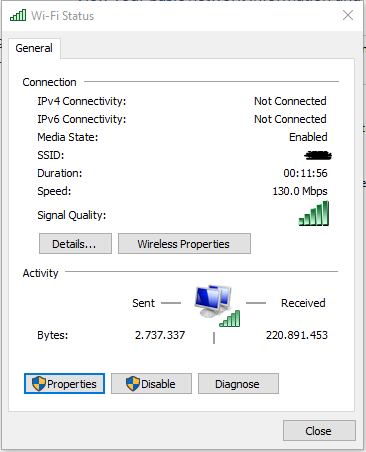
Now, your Wi-Fi Status should show you as Enabled but Not Connected
We are now ready to configure the WAN interface in the pfSense VM:
- Restart the VM
- In the
pfSenseconsole, select2) Set interface(s) IP address - Select
WAN (em0 - dhcp, dhcp6) - Answer
nto the question to use DHCP - Enter the new WAN IP address. According to our schema, this should be
192.168.1.3 - Enter the subnet mask
24 - Enter the WAN IPv4 upstream gateway address
192.168.1.1 - Do not configure IPv6
- Do not revert to HTTP as the
webConfiguratorprotocol
Now, we have all the pfSense network interfaces correctly configured
It’s time to plug the cable and verify that it is working:
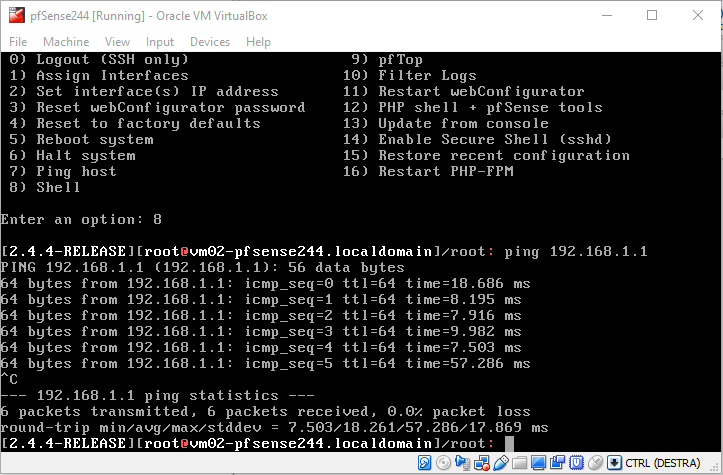
To verify, enter into the shell on the pfSense VM and try to ping the router 192.168.1.1
The same attempt on the laptop gives Destination host unreachable, which means there are still configuration to do.
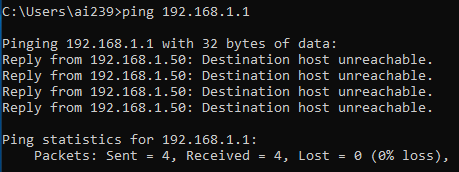
The problem is quite immediate to identify: the Ethernet adapter VirtualBox Host-Only Network adapter has an IP address 10.0.0.2, but has no Default Gateway configured so the packets leaving our only connected interface do not know where to go. We need to configure that gateway!
A quick check on the adapter’s properties on VirtualBox immediately shows that there is not such option. Let’s try on the Host side.
Open the Network Connections in Control Panel; select the VirtualBox Host-Only Network adapter; open its properties; select Internet Protocol Version 4 (TCP/IPv4) and modify its properties by adding 10.0.0.1 as default gateway.
Save the new configuration, verify it with an ipconfig -all command and retry to ping the router. This time you should succeed.

Let’s verify that it is really working: open your web browser, go surfing and pat yourself on the shoulder!
Step 6 - Do not forget to change the password of your pfSense Admin!
We still have the default password for the admin. Now it’s like a good time to change it.
Open the webConfigurator and login with the default credentials. You will be presented with a WARNING advising you to change your password. Go on and do it!
Don’t be miser here: this will be your first line of defense, so use plenty of characters for that password! You have a password manager, don’t you?
Try a logout/login to be sure that you have the right password. Were you able to login? Good! You’re almost there. Let’s play a little bit before to call it a day.
Step 7 - Reboot and test
Let’s see if our configuration survives a reboot and check different possible scenarios.
Shutdown the pfSense VM; reboot your machine and come back here for the last rush.
…
Ok, so now you should have restarted with no ethernet cable connected and no wi-fy. You’re in an isolated environment.
Open a Command Prompt and issue an ipconfig -all command to verify that the VirtualBox Host-Only adapter is still configured correctly.
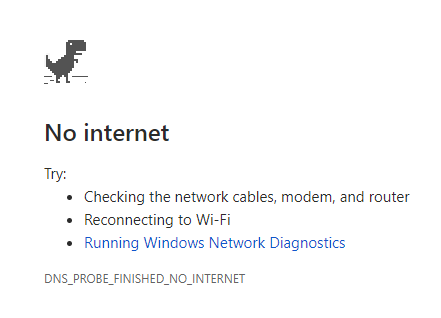
Next try some browsing: you should not be able to reach any site.
Now, let’s plug the ethernet cable in. You should get your 192.168.1.x ip address and should be able to browse, since this path is not firewalled.
Now, unplug the network cable and verify you cannot browse anymore.
It’s time to start our firewall and connect over Wi-Fi.
- Connect to the network (or you can enable
connect automatically) - Start the
pfSenseVM - Browse.
You should be able again. Let’s check it is working with a traceroute:
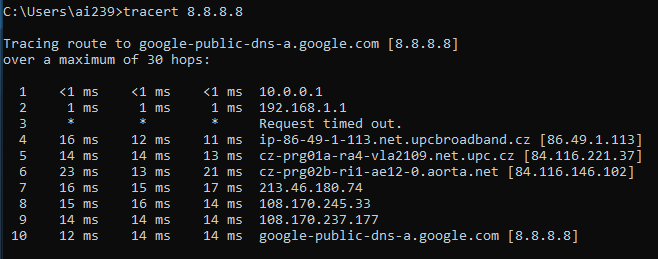
Let’s try the last test: what will happen if I plug back the ethernet cable? This time I’ll have two possible routes to follow: which one will be followed? Well, it appears that it will still follow the firewalled one, but I’m not sure about this and will research more in the future.
Step 8 - Conclusions
We’ve come to the end of this afternoon experimentation. We now have a fully functional firewall that we can put in front of our Wi-Fi connection when we are outside.
When we are inside, we can use the cabled connection (which is supposedly safe). If we still want protection on the inside, we can still detach the cable and start the protected Wi-Fi connection.
This is just the first step: there is still a lot to study in order to understand how to use pfSense in an home setting, but this is for another tutorial.
I hope you enjoyed this tutorial.